Hey you guys...so today i wanted to share something that i love making for friends and family! Picture tile coaters. If you can recall a few days ago i gave a tutorial on how to make tile coasters with stamps or the paper of your choice. Well this time it's pictures. I love this idea because they make such a special gift, especially with Christmas coming up! My mom wanted a set of coasters from my wedding pictures and i never got them done until now...almost three years ago! yikes...well at least there done and ready to be shipped to her! I know she'll love them!
So you basically need the same tools that you needed from the other tutorial: mod podge, sponge brush, the pictures of your choice, acrylic sealer, felt, scissors and glue gun.Once you have everything your ready to begin! Here are a few pictures to walk you through the process:) Have fun!
Have your tiles ready. I got mine at Lowe's for ten cents each! Great price :)
Cut you pictures according to the tile size and make sure they fit perfectly.

Once you have those ready, start applying a thin layer of mod podge to the tile.

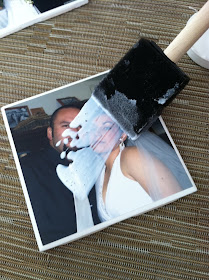
Now set your picture on your coaster and make sure it's centered and that there are no bubbles or wrinkles. Do this fast before the mod podge begins to dry!

Do this with all four of them. When you apply the mod podge it'll look white but once it begins to dry, it will be clear.

Just like this. Now once the pod podge has dried you can go ahead and spray acrylic sealer on (just remember even with the layers of acrylic, mod podge still takes about a month to fully cure so don't use it for hot drinks yet! Only cold). You may also apply felt on the back of the tile so it gives it more of a clean and prettier look.

And here they are, DONE. You can wrap them with whatever you want. I added some lace and loved how it looks! Hope you make some too and have fun :)


Cute !!!
ReplyDeleteSuch a simple gift idea! I love the wedding pics, too. :0)
ReplyDeleteThanks you guys!
ReplyDelete