Showing posts with label Recipes. Show all posts

Monday, January 16

Low Calorie Whole Wheat Tortilla Pizza

Hello everybody! Wow It's been a while and I apologize! Its been a nice break though but starting today I'm officially back :)
So since I'm happy to be posting once again, I wanted to start the week with a great recipe.
This low calorie whole wheat tortilla pizza is only about 230 calories. It's so yummy!
Feel free to change things up a bit according to your likes and dislikes. Add different veggies and play with the ingredients as you wish.
The tortillas we got are only 80 calories which is great. My hubby got them at sprouts and the marinara sauce as well. Lately we've been counting our calories and keeping our meals at 400 calories or less. I love being able to cook healthy food for me and my family. I love how I can still have the same great flavors but eliminate all the extra junk that is bad for you and on the long run is nothing but empty calories.
Hope you try this easy recipe out. Im sure your kiddos will love it :) Here a few pictures!
Blessings...

Friday, December 2

Buttermilk Pancakes

So I wanted to share a quick Buttermilk Pancake recipe that i came up with. It's super easy to make because it doesn't have a whole lot of ingredients.
This recipe has no oil which makes it even better. No need to clog your arteries :)
I tried it first and they still came out fluffy and moist. Mmm love me the smell of pancakes in the morning! Don't you?
I added some blackberries because my son just loves them. They tasted so good with the pancakes and the maple syrup on top.
If you don't have any buttermilk, no worries...milk is fine! Even fat free works and they still come out great. So here's the recipe.
* * * * * * *
Ingredients:
1 1/4 cups all-purpose flour
1 egg
1 1/4 cups buttermilk
1/4 cup granulated sugar
1 teaspoon baking powder
1 teaspoon baking soda
1 pinch salt

Directions:
1. Preheat a skillet over medium heat.
2. Mix all of the ingredients til combined.
3. Melt a little bit of butter in the pan.
4. Pour the batter by spoonfuls into the hot pan, forming 5-inch circles.
5. When the edges appear to harden, flip the pancakes.They should be golden brown.
6. Cook the pancakes on the other side until they are also golden brown.
7. Enjoy.

. . .Blessings. . .


Thursday, November 17

Apple Butter

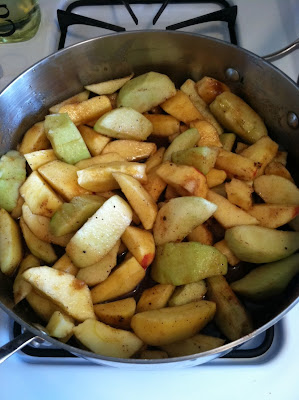
So do any of you have apples just sitting their? Not being eaten? I know I did until yesterday when I decided to make Apple Butter. It was also my day to make My Homemade Bread so i thought, "Mmmm warm bread with apple butter." Sounds amazing doesn't it!?! Well it tasted amazing! After searching for a few recipes i just came up with my own. Most of the recipes call for too much sugar and i didn't want to add that much. I don't need all that extra sugar and neither does my family. I used 1/2 a cup of brown sugar but next time i'm going to swap it for Agave Nectar. It's much better and healthier for you!
Okay so here's the recipe & a few pictures. It's really easy to make and it would be perfect on bread, toast, yoghurt, to use in your granola and even to sweeten up your cereal if you need to :)
*********************
Ingredients:
10-12 apples (you could use whatever apples you want)
1/2 brown sugar
1/2 apple juice
1/4 tsp of cinnamon
1/4 tsp of nutmeg
1/4 tsp go cloves

Directions:
1. Peel, core and slice all of your apples.
2. Simmer all of your ingredients in a pot until the apples are soft, the liquid has evaporated and the sauce is dark brown and thick.
3.Puree your mixture...DONE!
***************
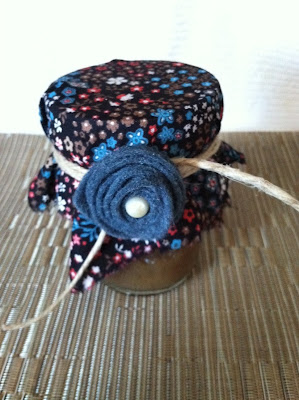
And of course i couldn't help but my crafty mind to wander so i had to pour some in a mason jar and wrap it up to give to somebody as a gift! When i saw how it looked i thought how cute it would be to give these away for Christmas! It makes a perfect little inexpensive gift and a tasty one too! Hope your inspired to make your own or to bless someone with a little taste of heaven.
Blessings...
"O taste and see that the LORD is GOOD." Psalm 34:8


Linking back to:
Featured On The  Crafty Nest


Sunday, November 13

Portobello Mushroom Pizza w/ Farfalle Pasta

Mmm love me some portobello mushroom.
I wanted to make something easy and simple for lunch today. Of course i could of just ordered a pizza with some garlic bread and soda ;/ But i decided to make my own twist and my own version of a healthier "pizza." So i came up with this.
I saw this tip on The Biggest Loser show a few seasons ago. I've changed it up according to what we like and enjoy. So here it goes...
*******************
Ingredients:
Portobello mushrooms
Tomatoes
cilantro
turkey
mozarella cheese
farfalle pasta
asparagus
salt and pepper
**********************
I didn't have any tomato sauce so i left that out, but if you do, go ahead and use it.
First of all cut off the stems from the mushrooms and set aside. Chop up your tomato, cilantro and turkey. (sorry, i took the picture before i cut the stems off!)
Add a layer of tomato to your mushroom, then add some turkey and then the cilantro. Top it off with some cheese, salt and pepper and stick in the oven for about 20 minutes at 300 degrees F. or until your cheese has melted.
While that's in the oven, start boiling some water for your pasta. When that's done after about 12-15 min. drain and keep in the same pot. Chop up your asparagus and more tomato. Add to your pasta and season with salt & pepper. Top it off with just a tad of cheese and cover until your mini pizzas are ready :)
DONE!!!!
Easy right, not complicated at all and super healthy! Of course you can do it all your way. You can add tomato sauce instead of the cubed tomato, you can add chicken instead of the ham, you can add whatever veggies you want to your pasta and make it taste perfect for your pallet :)
Do it however and add whatever! Experiment with different ingredients until it reaches perfection for you.
If you noticed i didn't add any butter or oil to the pasta! It's not really necessary and it helps you cut out the extra calories and fat.
Enjoy & Blessings

Tuesday, November 8

Baked Apple Chips

Hello you guys and hope your day was blessed! I wanted to share something that i did today with just 2 ingredients! That's right TWO! That's all it took to make this delightful snack!
It was so good and scrumptious! Next time though i will bake them for a little longer so they can be just a little bit crispier. Other than that, they were really good & their healthy too! Perfect for any toddler :)
All you need is 2-3 apples and cinnamon. Cut them up as thin as you can but not too thin!
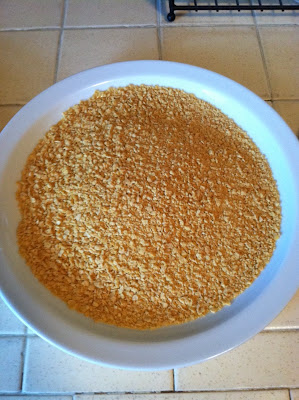
Set them on your cookie sheet lined with parchment paper and sprinkle cinnamon on them. Put them in the oven at about 200-225 F for an hour in a half, flip them over (at this point you can sprinkle more cinnamon on the opposite side) and continue to bake for another hour in a half to two hours.
Once there done wait for them to cool to transfer them to a plate or a ziplock baggy.
Here are a few pictures of the process.
ENJOY!

Linking back to:
Visit thecsiproject.comA Crafty SoireeFeatured On The  Crafty Nest

Friday, October 28

Homemade Almond Butter

Mmmm, love me some almond butter! I finally set my mind to making it and I'm in love! The nutty flavor is so delicious! I added my own twist to it & i didn't let it get too creamy because i like it kinda chunky so i stopped before, but that's up to you. Here's the recipe! Hope you make it some day and like it! It's so good on toast, slices of apple and...anything really :)
Ingredients:
2 cups of raw almonds
2 tablespoons of organic agave nectar
1/4 tsp. of cinnamon
a pinch of nutmeg
a pinch of ground cloves

Directions: Put the 2 cups of raw almonds in your food processor. Grind for about 2-3 minutes. Stop & mix. Repeat the process until you reach your desired consistency. Once you do, add the rest of the ingredients, mix one more time for about 30 seconds and your good to go. Store in the fridge :)
Enjoy :)

Wednesday, September 7

Mmm Chicken!!!

Hello, hope your week has been blessed so far. So i made some chicken today and although i hardly ever make anything fried, when i do we all enjoy it so much! My baby boy loves it! The recipe is really simple! Hope you enjoy!

Ingredients:
Chicken breasts ( you can buy them already cut into a fillet or you can cut it yourself )
Italian bread crumbs ( or corn flakes )
2 table spoons of milk
garlic salt with ground parsley
1 egg

Directions:
1. Season your fillet with the garlic salt and set aside.
2. Whisk the egg and the milk together and pour on top of your chicken. Move them around so that they get fully wet with the egg mixture.
*Have your crumbs ready on a plate. Have an extra plate to set your fillets once they've been coated.
3. Grab a fillet and cover it with the bread crumbs. I ran out so i just used my food processor and grounded some corn flakes. It comes out very good either way! It even tastes like fried chicken when you use the corn flakes.
4. In a pan have your oil ready ( i use coconut oil and it gives it a really nice taste to the chicken ). You need it to be very hot! Set your fillets in the pan and fry them for about a minute in a half on each side or until you see a nice crisp look to it. Flip them over and do the same on the opposite side. If you want them crispier, leave them in their for a little longer. Not too long though because you don't want to overcook your chicken :)

5. Have a plate ready with a paper towel on it. Remove your fillet and set on the paper towel. I like doing this because it helps to soak up the excess oil.
DONE!!!
You can serve it with anything! Mashed potatoes, rice, pasta, lentils, beans...really ANYTHING!
I kept it simple for my baby and myself. Hubby is out of town so i don't need to impress anybody for the next two weeks, lol! Except my 19 month old but he's easy. He eats just about anything :)
I had some corn on the cob so i just chopped it up, threw it in a pan with a little butter, salt and pepper and i was done!
God bless!

Sunday, September 4

Avocado Salsa

Hello :) Hope your day is blessed and the time with your family is cherished. I wanted to share a recipe that i got from one of my cousins. I modified it a little though :) Its really good and you can enjoy it on tacos, burritos, tostadas, broth, quesadillas and even as a dip. The way i make it turns out to be a little creamy but if you want you can add a little water so it won't be as thick. Also if you don't want it so spicy just add less chiles. I used 4 and it turned out to be quite spicy. Okay so here it is :) enjoy!

Ingredients:
1 ripe avocado
a handful of cilantro
a piece of onion
one clove of garlic
4 tablespoons of milk
green chiles
1/2 teaspoon of salt ( u can add more if you need to )

Directions:
Add everything to your blender or food processor (if using a food processor make sure u cut up everything in chunks so that by the third chop it's done. You can also add more water while chopping if u you need to.) Blend till it gets that creamy consistency. DONE! Easy right :)


Tip: Make sure that you eat it within the next 3-5 days. Since it has milk it won't last as long as salsa normally does.
God Bless You

LinkWithin

Related Posts Plugin for WordPress, Blogger...