Showing posts with label dessert Recipes. Show all posts

Sunday, December 11

White Chocolate Ghirardelli Peppermint Bark

Hello friends. Today i wanted to share a simple yummy dessert that you can make in no time.
Who likes white chocolate?
!!!ME ME ME!!!
It's so good, if there are any of you who aren't too fond if it, don't fret! You can use milk chocolate too & may i just add that Ghirardelli is the best, on my palette anyway.
I added a cute little packaging idea to these sweat treats. I thought they looked so so cute.
You can get these adorable boxes over at Michael's. I actually did this last year for little Christmas presents but i made cookies instead.
It's a simple, pretty, yet inexpensive gift that you can bless people with. Especially when you have a huge family :)
The bar is super simple to make! There are no right or wrongs to make it. You can make as much as you want or as little as you want. I didn't use specific measurements for the chocolate or the candy canes.
Here is a list of things that you will need:
Chocolate
Crushed candy canes
  • parchment paper
  • cookie sheets
  • glass bowl
  • rubber spatula
Method:
1. Break up your chocolate in pieces and place in your glass bowl. I did mine on a double boiler because I don't have a microwave but if you have one you can use that as well. (Do 30 seconds at a time until your chocolate is melted, be careful of not burning it though.)
2. Bring your water to a gentle boil and mix the pieces of chocolate about every minute or so. You'll notice how it slowly begins to melt.
3. Continue to mix until it's completely melted.
4. Have your cookie sheet ready with the parchment paper layered on top. Pour your melted chocolate and smooth out with your spatula.
5. Grab a handful of your crushed candy canes and sprinkle them over your melted chocolate. You have to do this part quick so that the candy sticks to the chocolate before it starts getting hard again.
6. Put a lot of candy over the chocolate, cover it all up. It seems like a lot but once you shake off the excess, a lot of it comes off!
7. After about an hour the chocolate should be hard again. (If you want to speed the process up, just put in the fridge and it should be ready in about half an hour.) Start breaking it up with your hands and have fun with it. You can leave big chunks of it or break it up into smaller pieces.
After you've broken it all up. You can start eating it, yay!!!
I got little cellophane baggies, filled them up with the chocolate, put a little bit of cute tape on to seal them & put them inside the little boxes.
Once they were closed i added a cute little tag to the side of the box that said "White Chocolate Ghirardelli Peppermint Bark."
And this is how they turned out.
Have a great week & may God bless you exceeding abundantly above all that you can ask or think!!!

Linking back to:
Craft & Tell

Tuesday, November 29

Apple Pie from Scratch

So today was a very hectic day for me! I did everything from preparing breakfast to washing dishes, sweeping, dusting, decorating the Christmas tree, changing diapers, doing loads of laundry, cleaning my bathroom, etc...! I was so tired. But i had to hurry because my mind was already set to preparing a special candlelight dinner for the hubby!
I got our babysitter to watch the kids for me & since she lives in the same apartment building, she was able to take the kids over to her apartment while i finished cooking dinner, lighting candles, getting the sparkling apple cider out, making the table pretty & doing the finishing touches on this amazing apple pie!
It's one of his favorites, so i decided i would make him one.
Maybe your thinking, "What was this special occasion for." The answer, a coupon! LOL :)
A couple of years ago my hubby and i attended a marriage retreat where they gave us each a little booklet with coupons that were good for specific things. Of course i used up mine right away. He took a little longer. Just the other day he found this last one and left it on my nightstand before he went off to work. So i thought, hmmm what would be a good surprise? I thought, what about a romantic candle light dinner, with jazz music playing in the background & a yummy dessert? So that's exactly what i did.
Not only was it fun but I think it's so important to keep the romance going in your marriage. I know that sometimes money can be tight but, who said you have to go out. Just fix something up for dinner that he really likes, make the house look prettier than usual, light some candles, get a babysitter & he will for sure love it!
The crust is from Ina Garten's Perfect Pie Crust, and let me tell you that it is. Whenever i'm looking for a recipe i always pay attention to the rating and this one was bomb! Seriously you gotta try it!
The filling was from Paula Dean's Apple Filling. It was so so good too. Not too lemony and not too sweet.Even though it's kind of a long process to make apple pie, it's totally worth it!
Well anyways, for you that are still reading, thanks and for you that aren't, you just missed out on a good apple pie recipe. And you don't even know it ;)
Blessings to you all!!!
P.S. Don't forget tomorrow, Wednesday the 30th is the last day to enter my first giveaway!!!
Come check it out HERE!!!

Linking back to:

Thursday, November 17

Apple Butter

So do any of you have apples just sitting their? Not being eaten? I know I did until yesterday when I decided to make Apple Butter. It was also my day to make My Homemade Bread so i thought, "Mmmm warm bread with apple butter." Sounds amazing doesn't it!?! Well it tasted amazing! After searching for a few recipes i just came up with my own. Most of the recipes call for too much sugar and i didn't want to add that much. I don't need all that extra sugar and neither does my family. I used 1/2 a cup of brown sugar but next time i'm going to swap it for Agave Nectar. It's much better and healthier for you!
Okay so here's the recipe & a few pictures. It's really easy to make and it would be perfect on bread, toast, yoghurt, to use in your granola and even to sweeten up your cereal if you need to :)
*********************
Ingredients:
10-12 apples (you could use whatever apples you want)
1/2 brown sugar
1/2 apple juice
1/4 tsp of cinnamon
1/4 tsp of nutmeg
1/4 tsp go cloves

Directions:
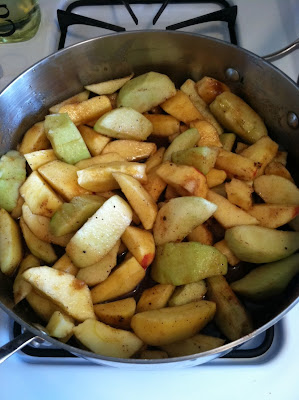
1. Peel, core and slice all of your apples.
2. Simmer all of your ingredients in a pot until the apples are soft, the liquid has evaporated and the sauce is dark brown and thick.
3.Puree your mixture...DONE!
***************
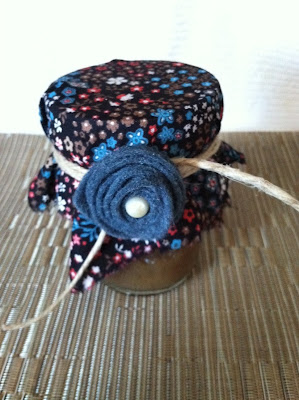
And of course i couldn't help but my crafty mind to wander so i had to pour some in a mason jar and wrap it up to give to somebody as a gift! When i saw how it looked i thought how cute it would be to give these away for Christmas! It makes a perfect little inexpensive gift and a tasty one too! Hope your inspired to make your own or to bless someone with a little taste of heaven.
Blessings...
"O taste and see that the LORD is GOOD." Psalm 34:8


Linking back to:
Featured On The  Crafty Nest


Monday, October 10

Best Brownies Ever!!!

So upon request from a friend i wanted to share the best brownie recipe that I've had so far! There moist, gooey and just the right amount of sweetness! Store bought brownies are good, but when you make them from home you avoid all the other extra junk that they put in it! This recipe is simple and it doesn't have that many ingredients. Hope you guys give them a try, there totally worth it!

Ingredients
1 cup butter, melted
3 cups white sugar
1 tablespoon vanilla extract
4 eggs
1 1/2 cups all-purpose flour
1 cup unsweetened cocoa powder
1 teaspoon salt
1 cup semisweet chocolate chips (optional)

Directions
Preheat oven to 350 degrees F (175 degrees C). Lightly grease a 9x13 baking dish.
Combine the melted butter, sugar, and vanilla in a large bowl. Beat in the eggs, one at a time, mixing well after each, until thoroughly blended.
Sift together the flour, cocoa powder, and salt. Gradually stir the flour mixture into the chocolate mixture until blended. Stir in the chocolate morsels. Spread the batter evenly into the prepared baking dish.
Bake in preheated oven until an inserted toothpick comes out clean, 35 to 40 minutes. Remove, and cool pan on wire rack before cutting.


So yummy! Enjoy :)

Thursday, October 6

Chocolate Chip Banana Muffins

Hello :) So i wanted to share this recipe upon request from a good friend :) It's one of my favorites. If i'm not in the mood for chocolate, i'll omit it :) There good every time with or without. Especially when there served with whipped cream...yum!
Okay so here it is, hope u enjoy :)

Chocolate Chip Banana Muffins

Ingredients
1 3/4 cups all-purpose flour
3/4 cup sugar
1 teaspoon baking powder
1 teaspoon baking soda
1/2 teaspoon salt
1 egg
1/2 cup vegetable oil
1/2 cup plain yogurt
1 teaspoon vanilla extract
1 cup mashed ripe bananas
3/4 cup semisweet chocolate chips

Directions
In a large bowl, combine the flour, sugar, baking powder, baking soda and salt. In another bowl, combine the egg, oil, yogurt and vanilla. Stir into dry ingredients just until moistened. Fold in bananas and chocolate chips. Fill greased or paper-lined muffin cups two-thirds full. Bake at 350 degrees F for 22-25 minutes or until a toothpick comes out clean. Cool for 5 minutes before removing from pans to wire racks.

Dry Ingredients
Banana, Wet Ingredients and Chocolate Chips
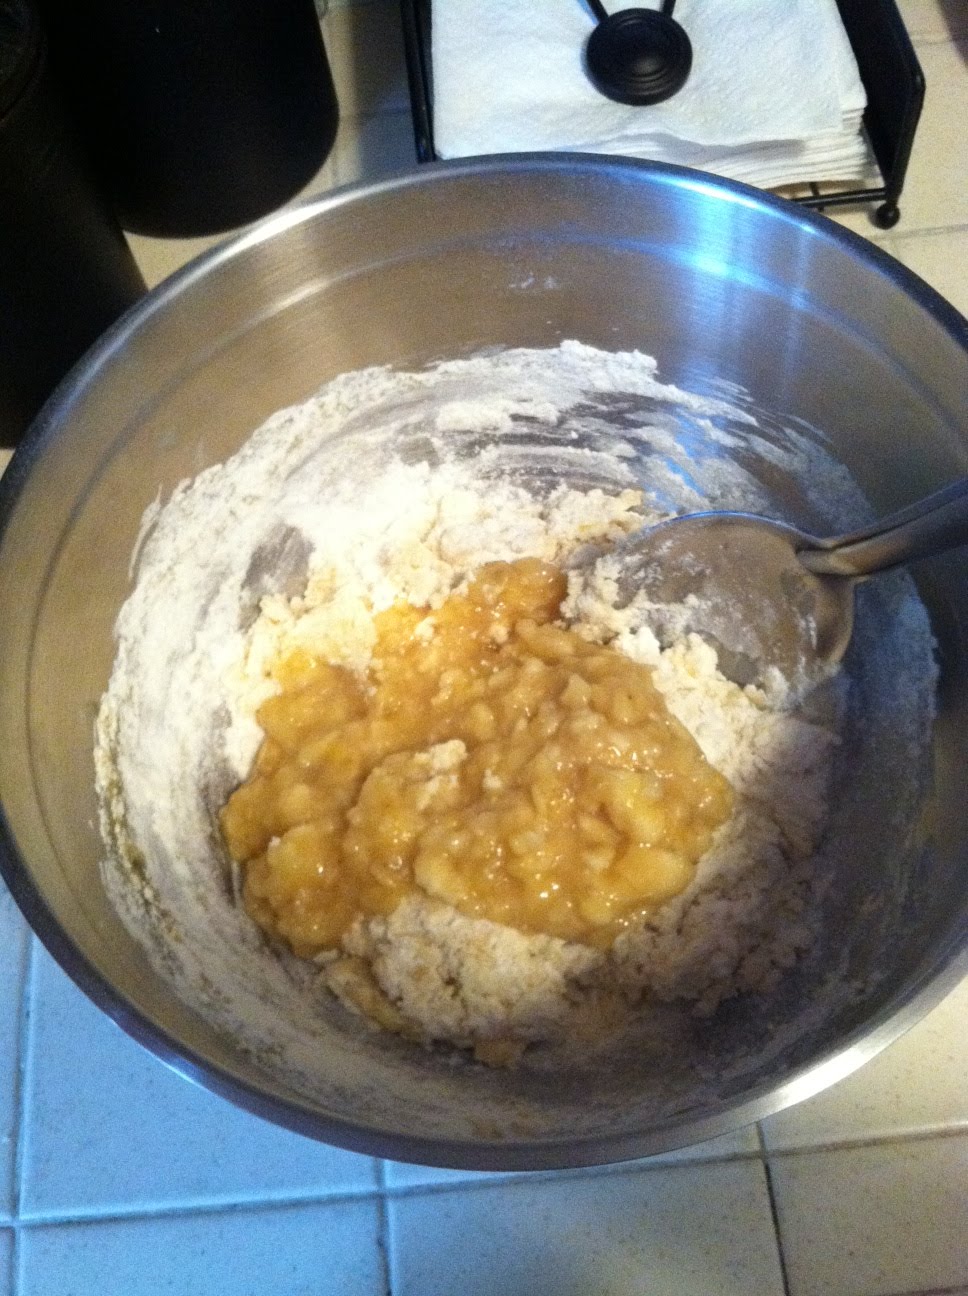
Pouring the wet ingredients over the dry.
Mix in the banana
Do Not over mix the batter because you'll end up with tough, rubbery muffins :/
Mix just until combined...
Line your muffin or cupcake tray with liners of your choice :)
You can use an ice cream scoop to pour the batter inside the liner.
That way you know that you have the same amount in each one!
Ready to go in the oven!!!
Ready to be eaten :) LOL
TIP: I reduced the oil content to 1/4 of a cup instead of 1/2, you may also use butter instead. Just melt it before and let it cool down before mixing it in with the rest of the wet ingredients :)
God Bless!!!

Thursday, September 29

Vanilla Cake with Raspberry Filling

Helloooo :) So Wednesday nights we have home fellowships where we read the Word, meditate on it and a time of prayer. It was sweet last night! After the teaching we had a time of prayer for each other. I love to see how God moves and how He answers prayer. He is such a great God and worthy of ALL our praise!
So of course since i love to bake, i had to make something for my company! LOL It's a great excuse for me to get in the kitchen and make something yummy! I decided to make a basic vanilla cake that i got from Martha Stewart a while back. It has buttermilk so it never fails to turn out really soft and moist! You get 2 round cakes with the recipe so i filled the center with raspberry preserves and covered it with heavy whipping cream that i made. I wanted to share the recipe for the whipping cream. It turns out really good and its not full of preservatives like the store bought whipping cream! I got a few snaps of the cake. My intention was to take a picture of the whole process but i was running out of time with getting the house ready for bible study, finishing up dinner, feeding Lex, etc...that i totally forgot till of course the cake was done! LOL Im sure you guys can figure it out because it's simple to put together!
So here's the recipe for the frosting (you can use it for anything tho)!

Ingredients:
Heavy Whipping Cream, (4 quarts)
4 tablespoons of sugar
3 teaspoons of vanilla

Directions:
In order for the whipping cream to form a soft peak faster, place the paddles and the bowl where you'll be whipping it in the fridge so its nice and cold (about 2-3 hours). It really does work!!!
Once they've been chilled, mix all the ingredients with a whisk in your bowl and beat on high for a good 3-4 minutes or until peak forms.
And then your done :) It's really easy to make and i love how it turns out every time!


Here's a picture of the finished cake :)
Mmmmm, so yummy.....
God Bless you guys!

Wednesday, September 28

Raspberry Thumbprints

Hello!!! I wanted to share another really yummy recipe. I love to bake cookies, especially with the Holidays just around the corner, it helps as inspiration to bake, bake, bake...so i decided to make these Raspberry Thumb Prints :)

And yes i got it from my favorite website: Joy of Baking
Here's the link: http://www.joyofbaking.com/ThumbprintCookies.html
Here's a few pictures that i took while making them!
There really easy and fun to make!

Dipping each little dough of ball in the egg white.
Rolling them in crushed almonds.
Making a small hole in the center of the cookie with my thumb where the jam will go in.


All done!

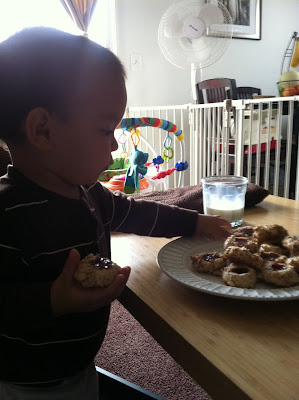
Sammy LOVED them! Can you tell!?!


XOXO

LinkWithin

Related Posts Plugin for WordPress, Blogger...